Monday 24 October 2011

Giveaway winner

Thanks to everyone who entered the Quilters Quest giveaway!
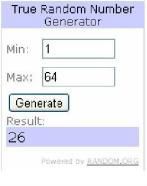
I have finally figured out how to post a copy of the random number generator!
Patience was needed, but I got there in the end:)
Mr Random Number Generator has done his stuff and the winner is...
Photobucket
No. 26 - Congratulations Heather A!
Check your email!

Just to brighten up your Monday morning - here's a link to another giveaway going on at
'Love Affair With my Brother' - a chance to win 4 charm packs of Etchings by 3 sisters.

Wednesday 12 October 2011

Blocks for others

Quilters Quest giveaway is here

Before I start this post, I must apologise for the quality of the photos. The light had started to fade as I was taking them and I was unsure as whether or not to use the flash.
Anyway good or bad, here they are!
Today I made some blocks for Judith's charity quilting bee 'Bee Blessed'.
This is the second block for the 'bee' - a disappearing 9 patch block,
and is much larger than the wonky star block.
Next I made some blocks for Karen's 'Kind Stitches Bee'
She is making some non wadded quilts for a children's shelter in Pattaya, Thailand.
I hope these bright fabrics bring a little cheer.
Both these ladies from Northern Ireland, Judith and Karen,
are spreading a little quilty kindness to others through these bees.
They would really love your support by donating some blocks to their bees.
Check out their blogs for more details.

Monday 10 October 2011

Quilters Quest Giveaway

This giveaway is sponsored by Quilters Quest, Belfast.
GIVEAWAY NOW CLOSED
Quilters Quest is without doubt, the largest patchwork and quilting shop in Northern Ireland, with over 1500 bolts of fabric to choose from, waddings, notions, kits..you're spoilt for choice!
This wide range of fabrics can also be found in the online shop, along with information about weekly classes and longarm quilting service by Yvonne.
In 2010, Yvonne won Best in Country - 'Ireland' with her quilt 'Twilight Sunsets', at the World Quilt Show,New England.
Yvonne did some fantastic long arm quilting on my 'Dot Dot Dash Quilt' for the Moda Bakeshop:
and also on my 'Blue Moon' quilt which is featured on the
front cover of Popular Patchwork magazine:)

One day Saturday workshops at Quilters Quest are very popular
and cover loads of techniques -
free motion quilting, piecing curves, handbags, folded patchwork -
the list is endless!
Check out the Quilters Quest website for the list of Saturday classes.

So here's the giveaway from Quilters Quest -
a beautiful 'Wildflower Fairies' panel
(Wouldn't that make a beautiful centre panel for a little girl's quilt?)
and also four fat quarters from Fabric Freedom's new range 'Deco Delights'
Here's how to enter:
1. 'Like' Quilters Quest on facebook, and come back and tell me.
2. Visit the Quilters Quest website and come back and
tell me what would be top of your shopping list!
3. Blog/facebook about this giveaway and come back and tell me.
4. Become a follower of Lisnaweary Quilts, or tell me if you already are:)
Giveaway closes 22nd October 2011 @ midnight GMT.
Internationl entries welcome!

Thursday 6 October 2011

Blarney Roses?

A tune for Thursday.
Get your dancing shoes on and do a jig around the sewing room


You'll be humming this tune all day:D

Tuesday 4 October 2011

Posh Pumpkins Tutorial

I must say that pumpkins are not something that is traditionally grown in Ireland.
You are more likely to find a turnip in vegetable gardens, than a pumpkin!
But I do love them, especially for home decor!
So here is my version of the fabric pumpkin.
Some posh pumpkins;)
Not made from checks or plaids
But from some recycled ties!
Beg or plead from your family and friends - gather up some ties in autumnal colours!
Pick them apart, remove any wadding and press well to remove creases.
The measurements used are for the large pumkin,
the measurements for the smaller one are in the brackets.

1. Cut out a piece of non-iron on interfacing 12" x 24" (8 1/2" x 16").
Draw lines 3" (2") apart.
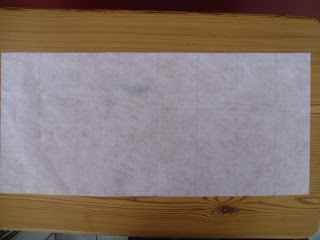
2. Cut strips from the ties 3 3/4" x 12" (2 3/4" x 8 1/2")
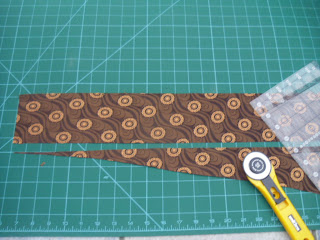
3. Swap the strips about and arrange the fabrics until you are happy with the layout.
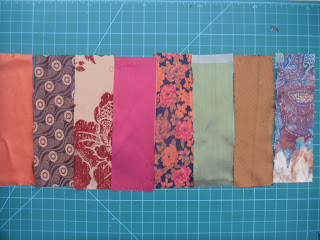
4. The strips are sewn on using the stitch and flip method. Take the first strip of fabric and place right side up, on the opposite side of the interfacing from the drawn lines.
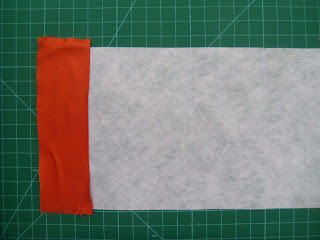
5. Place the second strip on top, right sides together. Pin together.
6. Flip over, and pin strips together along the sewing line.
(Pin really well as tie fabric tends to shift!)
7. Sew along line.
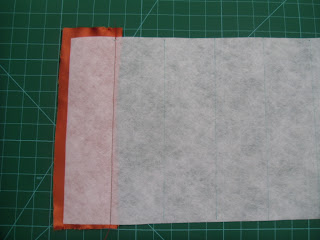
8. Flip back
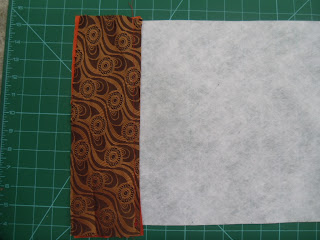
9. Fold second piece over.
11. Place third strip, right sides together on top of second strip and repeat previous steps,
until interfacing is covered.
12. Fold fabric in half, right side together. Sew a 1/4" seam to join sides together.
13. This makes a tube.
14. Take a 36" (24") piece of string. On the wrong side of the tube, place the string next to the edge of the fabric. Change the stitch on the sewing machine to a large zigzag stitch - it needs to be large enough to sew either side of the string and not catch it.
15.Sew the string on to the top of the tube, stop sewing when the start point is reached. Leave two ends of string hanging down.
16. Repeat for the other end of the tube.
17. At one end, start pulling both strings to gather the tube.
18. Try to get it as tight as possible - without breaking the string!
19. Tie off securely.
20. Place a small scrap of fabric over the whole to stop any stuffing falling out.
21. Stuff the pumpkin - firm or squishy? Your choice!
22. Pull the strings to gather the top of the tube.
23. Thread the string through a large needle and tie off securely. Then push the needle and string down through the pumkin to the bottom and back up again in order to make a 'dip' in the middle.
24. Keep sewing back and forth until all the string is used - tie off securely.
25. Cut out pumpkin stalk from felt or wool and sew some line down both sides.
26. Place stalks wrong sides together and sew a scant 1/4" seam down each side.
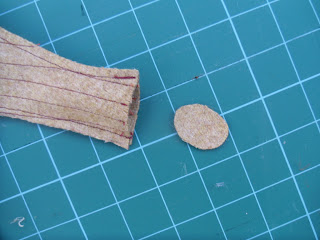
27. Cut out an oval for the top of the stalk.28. Place at the top of the stalk and hand sew in place.
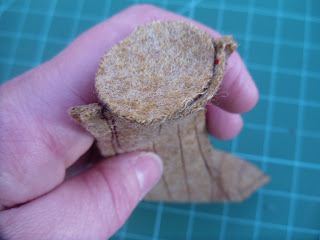
29. Stuff the stalk.
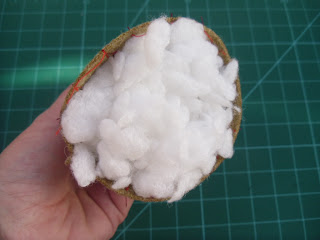
30. Place on top of the pumpkin and pin in place.
31. Using a double strand of embroidery thread, whip stitch the stalk in place.
32. To finish off, I tied some string around the stalk and a pumpkin leaf.

Roxy certainly blends in with them!
She's such a poser!
If you try these pumpkins I'd love to see some photos:)
You can upload your photos to the flickr group here.