I must say that pumpkins are not something that is traditionally grown in Ireland.
You are more likely to find a turnip in vegetable gardens, than a pumpkin!
But I do love them, especially for home decor!
So here is my version of the fabric pumpkin.
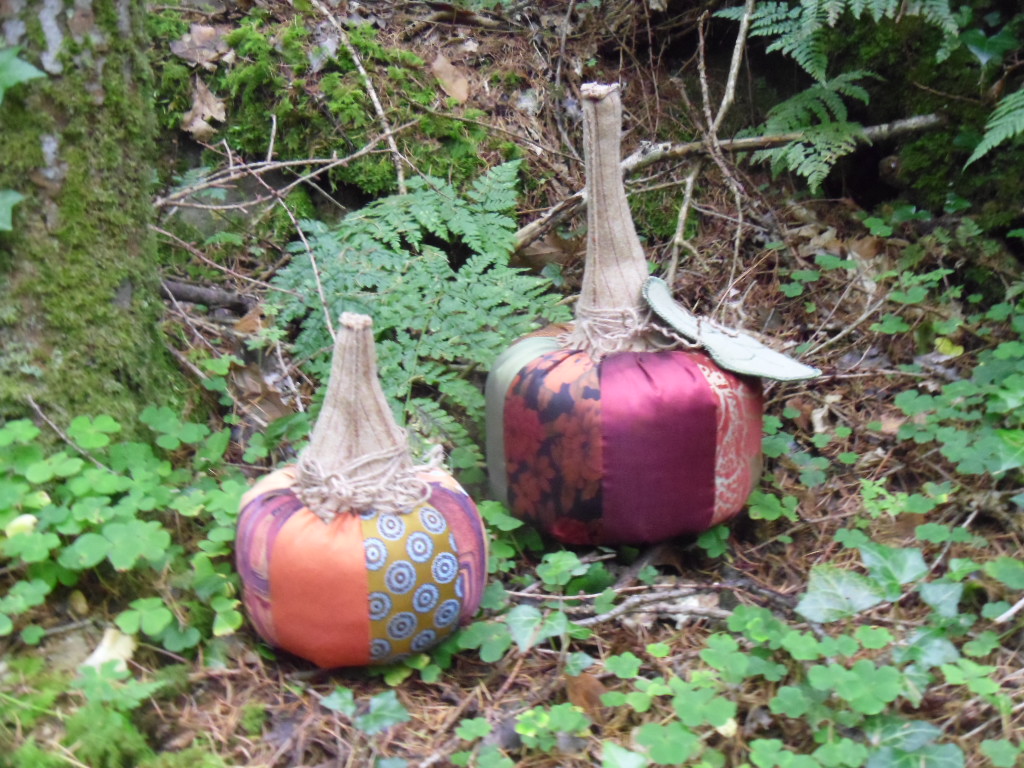
Some posh pumpkins;)

Not made from checks or plaids

But from some recycled ties!
Beg or plead from your family and friends - gather up some ties in autumnal colours!
Pick them apart, remove any wadding and press well to remove creases.

The measurements used are for the large pumkin,
the measurements for the smaller one are in the brackets.
1. Cut out a piece of non-iron on interfacing 12" x 24" (8 1/2" x 16").
Draw lines 3" (2") apart.
 2. Cut strips from the ties 3 3/4" x 12" (2 3/4" x 8 1/2")
 3. Swap the strips about and arrange the fabrics until you are happy with the layout.
 4. The strips are sewn on using the stitch and flip method. Take the first strip of fabric and place right side up, on the opposite side of the interfacing from the drawn lines.
 5. Place the second strip on top, right sides together. Pin together.
 6. Flip over, and pin strips together along the sewing line.
 (Pin really well as tie fabric tends to shift!)
 7. Sew along line.
 8. Flip back
 9. Fold second piece over.
 7. Sew along line.
 8. Flip back
 9. Fold second piece over.
 10. Press well.
11. Place third strip, right sides together on top of second strip and repeat previous steps,
 until interfacing is covered.
 12. Fold fabric in half, right side together. Sew a 1/4" seam to join sides together.
 13. This makes a tube.
 14. Take a 36" (24") piece of string. On the wrong side of the tube, place the string next to the edge of the fabric. Change the stitch on the sewing machine to a large zigzag stitch - it needs to be large enough to sew either side of the string and not catch it.
 15.Sew the string on to the top of the tube, stop sewing when the start point is reached. Leave two ends of string hanging down.
 16. Repeat for the other end of the tube.
 17. At one end, start pulling both strings to gather the tube.
 18. Try to get it as tight as possible - without breaking the string!
 19. Tie off securely.
 20. Place a small scrap of fabric over the whole to stop any stuffing falling out.
 21. Stuff the pumpkin - firm or squishy? Your choice!
 22. Pull the strings to gather the top of the tube.
 23. Thread the string through a large needle and tie off securely. Then push the needle and string down through the pumkin to the bottom and back up again in order to make a 'dip' in the middle.
 24. Keep sewing back and forth until all the string is used - tie off securely.
 25. Cut out pumpkin stalk from felt or wool and sew some line down both sides.
 26. Place stalks wrong sides together and sew a scant 1/4" seam down each side.
 27. Cut out an oval for the top of the stalk.
 28. Place at the top of the stalk and hand sew in place.
 29. Stuff the stalk.
 30. Place on top of the pumpkin and pin in place.
 31. Using a double strand of embroidery thread, whip stitch the stalk in place.
32. To finish off, I tied some string around the stalk and a pumpkin leaf.


Roxy certainly blends in with them!

She's such a poser!
If you try these pumpkins I'd love to see some photos:)
You can upload your photos to the flickr group here.
Cuteness! What a great idea for this time of year.
ReplyDeleteWhat a clever idea! They are so pretty!
ReplyDeleteSo pretty!
ReplyDeleteWell done you!
Very cute, and great recycling idea
ReplyDeleteVery cute, and great recycling idea,i like it...
ReplyDeletebuy eden gold
eden gold
RS Gold
Dead posh and very seasonal! Plum puddings next?
ReplyDeleteWhat fun! Cool idea to recycle ties! Jxo
ReplyDeleteMy beloved father recently passed away. He always dressed beautifully and had many lovely silk ties. I gave their pick to family and friends and still had many left. I took them to our local charity but they had so many that they were disinterested in them so I took them home rather than throw them away. This is a brilliant idea for Thanksgiving decorations since I invite family and friends over for Thanksgiving dinner. Dad will be there in spirit and his memory will remain alive through this cute craft.
ReplyDeleteWhat a great Halloween project!!!
ReplyDeleteHere is a place to get crafting neckties online
https://www.etsy.com/listing/223549503/neckties-for-crafting-in-large-priority?ref=shop_home_active_1
jordan 6
ReplyDeletegoyard outlet
yeezy boost 350
jordans
curry shoes
kyrie 8 shoes
off white outlet
yeezy
golden goose
kd shoes
Thanks great bllog
ReplyDeleteRespect and I have a swell offer: Where To Start With Whole House Renovation house reno shows
ReplyDeleteGreat share! Students often underestimate how useful Study Support Services in Australia can be for managing their workload. These services give direction and motivation. Additionally, Academic Editing & Proofreading ensures their efforts are presented in the best possible way. This combination not only saves time but also boosts academic confidence.
ReplyDelete